
Setup Checklist
- Before You Start
- The Steps in Order
- Step 1: Business Details
- Step 2: Payment Methods
- Step 3: Switch On the Modules You Need
- Step 4: Units and Categories
- Step 5: Locations
- Step 6: Products and Opening Stock
- Step 7: Staff, Users and Roles
- Step 8: Customers and Suppliers
- Step 9: Printers
- Step 10: Make a Test Sale
Before You Start
Set up TradeOne in the order below. Each step needs the one before it. For example, you cannot add a product until you have a category and unit to choose from, and you cannot ring up a sale until there is stock at the counter.
Plan to spend an hour or two. Have these ready:
- Your business name, phone, email and address as you want them on receipts.
- Your KRA tax rate, if you charge VAT.
- A list of your products with cost price, selling price and how many you have on the shelf.
- The names and phone numbers of your staff.
The Steps in Order
| Step | Where | Chapter |
|---|---|---|
| 1. Business details | Administration > Business Settings > General | Business Settings |
| 2. Payment methods | Business Settings > Payment Methods | Business Settings |
| 3. Modules | Business Settings > Features | Business Settings |
| 4. Units, categories | Catalog > Units, Catalog > Categories | Units and Categories |
| 5. Locations | Inventory > Locations | Locations |
| 6. Products | Catalog > Products | Products |
| 7. Staff and users | Administration > Admin | Users and Roles |
| 8. Customers, suppliers | Customers > Customers, Inventory > Inventory Hub > Suppliers | Customers, Purchases and Suppliers |
| 9. Printers | Business Settings > Print Management | Printing Receipts |
| 10. Test sale | Home > Point of Sale | Point of Sale |
Step 1: Business Details
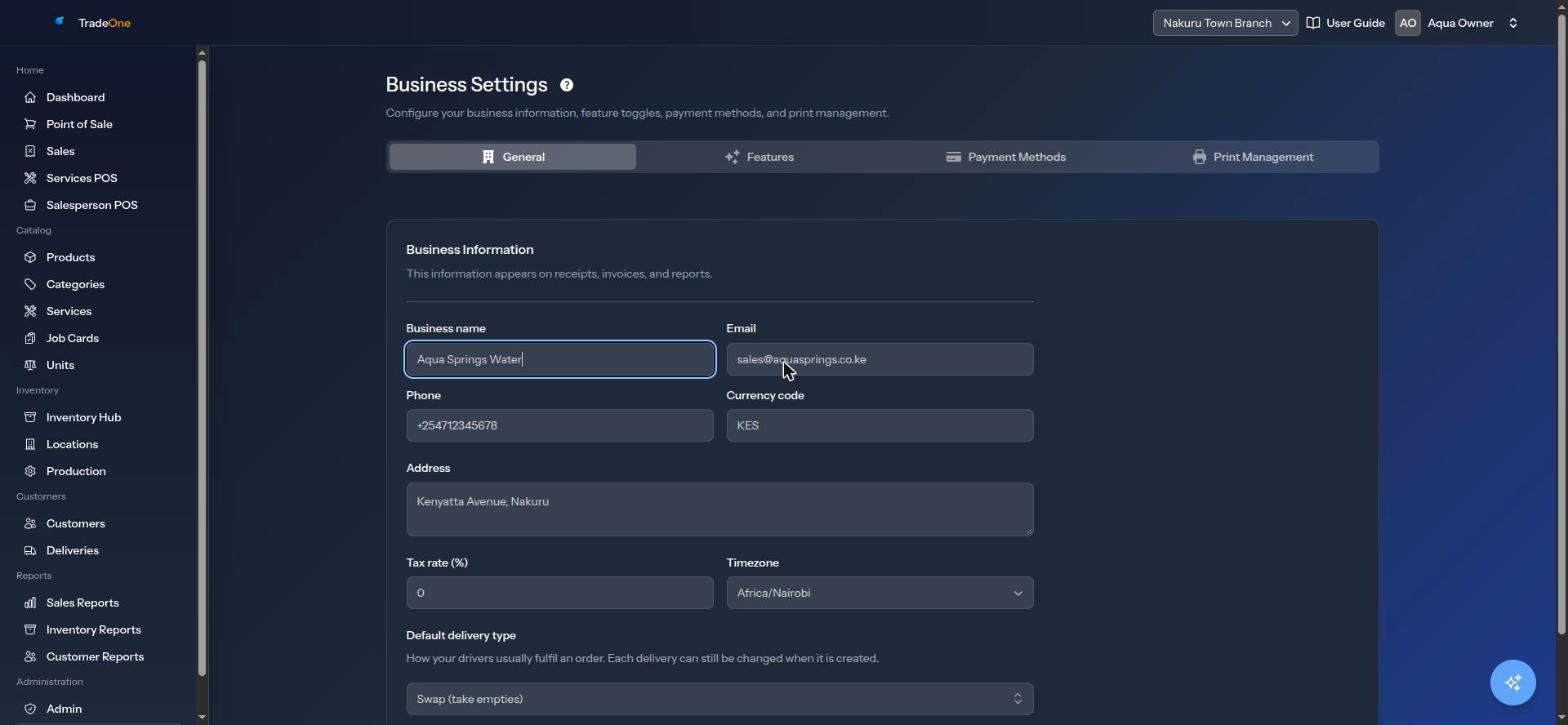
Open Administration > Business Settings. On the General tab fill in:
- Business name, Email, Phone, Address. These appear on receipts, invoices and reports.
- Currency code: 3 letters. New businesses start with
KES. - Tax rate (%): from 0 to 100. Leave at 0 if you do not charge tax. The till adds this to every sale.
- Timezone: new businesses start with
Africa/Nairobi. - Default delivery type: only matters if you use Deliveries.
Press Save changes. You will see "Business settings saved."
Step 2: Payment Methods
Open the Payment Methods tab. New businesses start with Cash, Credit and Deposit switched on, and M-Pesa and Bank Transfer switched off. Switch on the ones you accept. Only enabled methods show at the till.
Step 3: Switch On the Modules You Need
Open the Features tab. Switch on only what you will use. For example:
- A water refill shop with a delivery van: Deliveries, and perhaps Price stock by batch.
- A shop with a back store: Warehouse / multiple stores.
- A repair shop: Services, then Job Cards.
- A bakery or tailor that makes goods: Manufacturing / production.
Step 4: Units and Categories
Twelve units come ready (pieces, kilogram, litre and so on). Add any you miss, such as "crate". Then create your categories, for example "Drinking Water" or "Cement". See Units and Categories.
Step 5: Locations
Every business has one default counter called "Counter". Add warehouses only if you switched on Warehouse / multiple stores. See Locations.
Step 6: Products and Opening Stock
Add your products in Catalog > Products. On a new product you can enter the Opening stock: how much you already have on the shelf. Choose the location where it is kept. See Products.
Note
The till sells only from the default counter. Keep your opening stock at the counter, or transfer it there later.
Step 7: Staff, Users and Roles
In Administration > Admin:
- Add each person on the Staff tab.
- Create roles on the Roles tab (for example "cashier"). Tick the permissions each role needs.
- On the Users tab, press New user, pick the staff member and assign a role.
The new user gets the password 12345 and must change it at first sign-in. See Users and Roles.
Step 8: Customers and Suppliers
Add customers you sell to on account. Add suppliers you buy from. You can also add them later while working.
Step 9: Printers
Install the Print Agent on the computer connected to your receipt printer, then pair it. See Printing Receipts.
Step 10: Make a Test Sale
Open Point of Sale, add an item, pay with cash and press Complete Sale. Check that:
- The receipt prints.
- The sale appears in Sales.
- The stock at the counter went down in Inventory > Inventory Hub.
If you used a test item, you can void the sale in Sales to put the stock back. See Sales History.